t0ph4x0r
Lieutenant

Number of posts : 6
Age : 34
ranking : 5775
forum activity : 0
Registration date : 2009-02-01
 | | Subject: HTML tutorial #2- adding images/ fun with pictures Sun Feb 01, 2009 7:52 am | |
| Hello, my name is Cole Snydle. In my tutorials i will be using a mixture of PHP and HTML. One of my favorite hosts (a host is what you "host" your website on) is http://www.freehostia.com/. The good thing about Freehostia is that you can code from the site and you can host PHP and MySql. now just open up "Notepad", always and we will begin the tutorial.In my last tutorial you made a black web page with a heading, now were gonna have some fun with images (AKA pictures)
so lets take the final code from last tutorial and we'll continue from there.[glow=red,2,300]Original[/glow] - Code:
-
<html>
<body>
<BODY bgcolor="black">
<h1><font color="red">HTML tutorial #1</font></h1>
</body>
<html>
So lets add an image. now in freehostia, you just save an image from the internet, upload it, and type the image name in the quotes. i will explain both scenarios.Scenario 1 - freehostiaNow lets say that you uploaded a picture to freehostia called "vida_guerra.jpeg", you bould use the code as following: - Code:
-
<img src="vida_guerra.jpeg"> now lets add that to the main block of code, and set it down a few lines using line breaks ( <br> ). - Code:
-
<html>
<body>
<BODY bgcolor="black">
<h1><font color="red">HTML tutorial #1</font></h1>
<img src="vida_guerra.jpeg">
</body>
<html>
Scenario 2 -From the internetNow lets say you found a picture on photobucket, im using photobucket as an example because it has a perfect feature were it has the "direct link" of the photo. example- "https://2img.net/h/i217.photobucket.com/albums/cc1/estefani84/Stewie_Griffin.gif", no we just type the code and put that link in the quotes - Code:
-
<html>
<body>
<BODY bgcolor="black">
<h1><font color="red">HTML tutorial #1</font></h1>
<img src="http://i217.photobucket.com/albums/cc1/estefani84/Stewie_Griffin.gif">
</body>
</html>
And now you have an image, lets go a little bit farther in to images, how bout you set an image as a link? here, ill show you the individual code then add it to the main block of code. - Code:
-
<a href="http://www.bounty-wars.co.nr/">
<img border="0" src="http://i217.photobucket.com/albums/cc1/estefani84/Stewie_Griffin.gif" width="65" height="38">
</a> Oh, i almost forgot, you can use Marquee to make things scroll across the screen. - Code:
-
<marquee><font color="maroon">Hey, this is marquee</font></marquee> [glow=red,2,300]final block of code[/glow] - Code:
-
<html>
<body>
<BODY bgcolor="black">
<h1><font color="red">HTML tutorial #1</font></h1>
<a href="http://www.bounty-wars.co.nr/">
<img border="0" src="http://i217.photobucket.com/albums/cc1/estefani84/Stewie_Griffin.gif" width="65" height="38">
</a>
<marquee><font color="maroon">Hey, this is marquee</font></marquee>
</body>
</html>
And there you have it, this is the product so far: 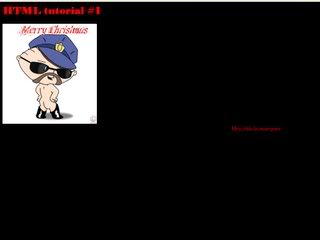 | |
|